Wednesday, July 30, 2014

Retiring...

Hello! Dropping in to share a couple cute cards with you and also a reminder that before the launch of Annual Inspirations (on Friday!!!) products in the Spring/Summer 2014 Idea Book retire tomorrow!

CTMH: Balloon Ride Paper & July Stamp of the Month: Circus Alphabet

CTMH: Balloon Ride Paper, Cloud Nine Stamp Set & Clear Sparkles

There are a few paper packs still in stock, lots of compliment and assortment packs, stamp sets and more... You can place an order at my online store and see all the items that are retiring and still in stock here.  Also, remember if you spend $50 or more you can get the July Stamp of the Month: Circus Alphabet for $5.

Happy Crafting!

Sunday, July 27, 2014

Sunday Paper: Accordion Flowers

Inspired by a package of clearanced Christmas themed paper accordion flowers I picked up and put some of my scraps to use!


I started with 12 inch strips and trimmed from there. The math teacher in me was looking for a ratio and the crafter in me was saying just go with the flow... One thing is for sure, the wider the paper the longer the strip. I found that for a 12 inch strip the widest that worked was 1.5 inches. (The flowers above are: 12x1.5, 11x1, 10 x 3/4, 10 x 1/2.)

You can whip these up in pretty much 4 steps!
1) Score your paper.
** The closer the score lines the thinner the flower will be.  If you look in the picture above I have one flower scored at every 1/2 inch which is a pretty thick flower/stands high off the page.  Since I will be using these for a scrapbook page embellishment scoring at every 1/4 inch is what I decided to stick to. Also, I scored every other line on the opposite side which made the accordian folding much easier because it almost naturally folds for you!  I didn't flip the paper over every other time, but did one side at a time.  Since I was scoring my paper every 1/4 inch I scored one side every 1/2 inch and then flipped it over and did the same making sure I was between the lines already done.
2) Accordian fold your paper.
3) Glue the ends together so you end up with a cupcake liner type shape.
4) Gather the top of the circle together and push down to create the center and flower.  Use glue to adhere a button or paper circle to the top.  You can adhere a paper circle to the bottom also to make it nice and sturdy. 


Add ink to the edges, use an edge trimmer, stamp on your paper or use patterned paper to create different looks!

Happy Crafting!

Wednesday, July 23, 2014

Pep Talk

Inspiring!

I love Kid President's videos!  This kid, Robby Novak a.k.a. 'Kid President', delivers messages in such a captivating way it's hard not to be motivated!


"You are way more than you might think you are.  You're more than your problems and you're more than your mistakes.  Somewhere inside you're a hero!" he says.

Be a hero. Be awesome!

Sunday, July 20, 2014

Sunday Paper

Now... this is my kind of Sunday Paper! How about it, a weekly installment of playing with paper? You with me?? You got it!! :)  Cards, scrapbook pages, home decor, who knows what... but it'll be here.

I got mail!  Of course, as soon as I could I ordered a box of new supplies but I also had to grab some of the current product before it was gone so this month I've been getting deliveries to my front door what seems like... frequently! hehehe  I just received my July SOTM, Circus Alphabet, on Thursday so in between the comings and goings of the weekend I took it out to play a bit.  It was the perfect opportunity for me to create an alphabet block card.


Creating this was pretty slick.  First, cover your acrylic block with all the letters you intend to use in the position you'd like them.  I thought that might be tricky, arranging 26 letters but it wasn't bad.  Decide on how big of an area you are going to stamp and then make sure the letters fit within that space.  Each row gets 5 letters and my 2nd row had 6 letters because "I" is skinny! :) Then, before you ink the background letters remove the letters you'd like to highlight in another color {HI}.  Ink and stamp the background image.  Place the letters you removed {HI} on another block in the position you'd like them and then use another color and stamp in the correct position.

Check back weekly for some inspiration as you drink your morning coffee (OJ, pop or whatever) and kick back to read the Sunday Paper.  Remember to come back to Inspire. Create. Cultivate. to see what's happening with the paper you really want to know about! ;)

Happy Crafting!

Wednesday, July 16, 2014

July Layout Workshop

The first 2 layouts this month used paper from the Jubilee Paper Pack.

I am really digging using paper as ribbons and adding a dovetail! This layout has room for several pictures across the middle of the layout and a special matted picture below.  Of course, pictures can be creatively added anywhere... have an extra small one? How about bottom right? Or a few itty-bitties up top?
CTMH Supplies: Jubilee Paper, Honey Triangle Washi Tape, Chocolate Ink
Other: Buttons, Fiber

A nice way to get in a many different patterns and colors without it being too overwhelming.  

This sunshine layout was super fun to make.  It easily has 7 photo-ready spaces.  If you read my post earlier this week from cards that I made in a prior workshop you'll see this is the layout that used the spray pen! :) So, fun! So, going to do it again sometime.  It's such a quick, easy, slick way to add a little something to your layout.
CTMH Supplies: Jubilee Paper, Cricut Artbooking, Honey Triangle Washi Tape,
Stamps: All the Details, Take Note & Babycakes, Inks: Goldrush, Honey, Pacifica, Spray Pen
Other: Toothpick, Wooden frame, Jewels


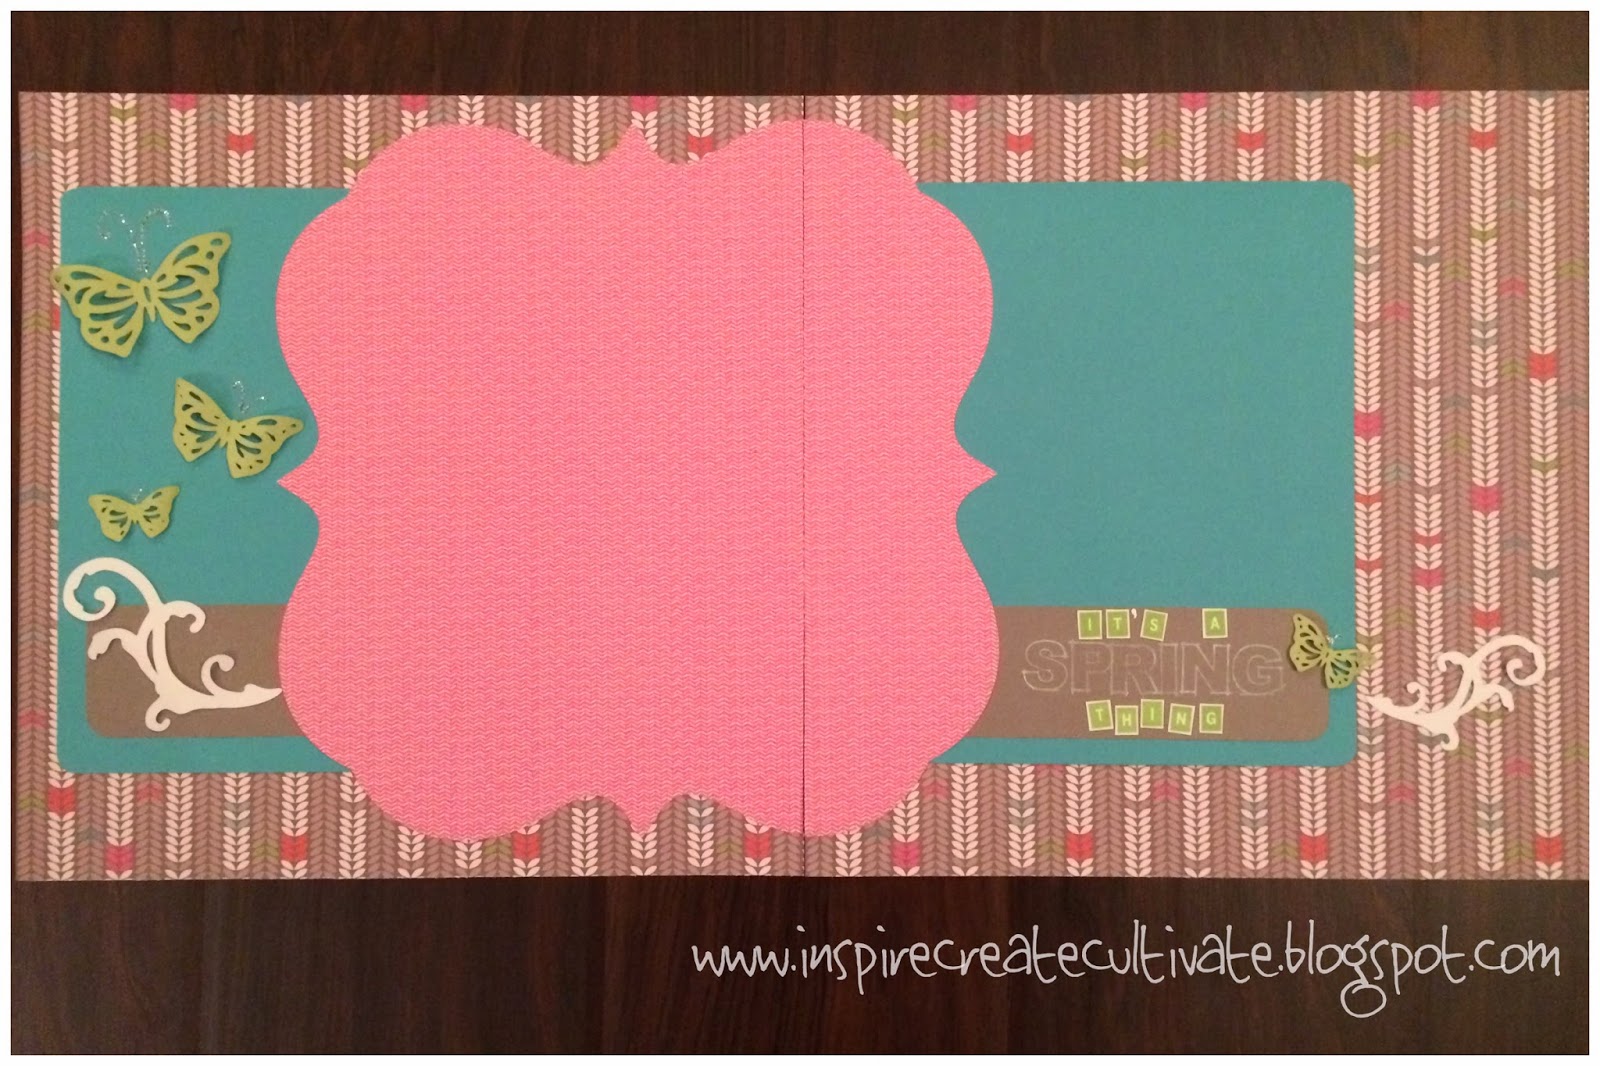
The final layout is a Spring layout using Lollydoodle paper, "It's a Spring Thing". Photos could be mounted in many different ways in this layout two that stand out to me: 1) Use the left side of the layout to mount a 5x7   photo and fill the right side with a row of photos stretching out about the title and flourish (single or double row depending on how many photos you have to include)  2) A couple horizontal 4x6 photos would fit perfectly on the left followed by a couple vertical 4x6 photos on the right.  The options are endless! :)
CTMH Supplies: Lollydoodle Paper, Cricut Artbooking, Stamps: Framework &
Keyboard Uppercase Alphabet, Inks: White & Pear
Other: Stickles
The Framework Alphabet and Keyboard Uppercase Alphabet are so fun to pair together!

I'd love to have you join us for the next layout workshop! The next layout workshop will be Tuesday, August 12th from 6pm-9pm.  Mark your calendar and plan to be there! The layouts we do in August will be with brand new paper from the new Annual Inspirations!! 

Also, remember to stop by on Tuesday, July 29th from 7pm-9pm for the Annual Inspirations Preview Party! More details are can be found here. 

Happy Crafting!